

~ Article by Warren James
I cannot believe that almost a month has gone by since our 5-day Wedding Photography Course with myself and Trompie van der Berg. We got some fantastic feedback and images by the students, and decided to write a short post and share some of the techniques they have learned:
Day 1-2: Commercial and Marketing Aspects of Wedding Photography
On the first two days, we focused on the commercial and marketing side of wedding photography. This includes discussions on developing a personal style, branding your business and other administrative and creative issues that a wedding photographer faces.
Day 3: Practical Shoot
We had a shoot with three gorgeous female models as well as a couple shoot, covering various basic as well as creative lighting techniques; from working with natural light to more elaborate flash and artificial lighting setups. We also covered some very important aspects related to posing and working with the models, and couple.
Day 4-5: Digital Workflow
On day 4-5 we covered digital workflow; from image selections to editing, and creating wedding albums. Our main focus is to establish consistency and accuracy without sacrificing creativity by using the latest and greatest editing software, presets and online services.
Techniques Learned
The “wedding shoot” is really the highlight of the wedding course and I would like to share some of the techniques we covered:
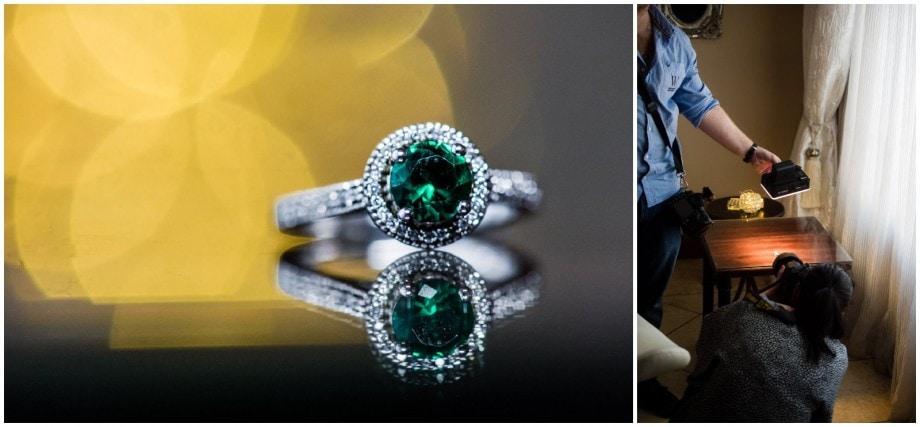
Back-lighting for Detail Shots
Back-lighting is most product photographers favourite lighting setup; whether you are using natural light, or flash. After demonstrating to the class on how to use natural window light, we showed how easy it is to use flash, or artificial lighting to achieve very dramatic and stylish results. For the image below, we’ve placed a tungsten gelled LED light above the ring and then shot into a small background of fairy lights. Using a 105mm macro lens allows for 1:1 magnification and adds great compression bringing the background forward into the image. For more techniques on photographing detail shots visit my previous article, on How to Shoot Spectacular Wedding Detail Shots.
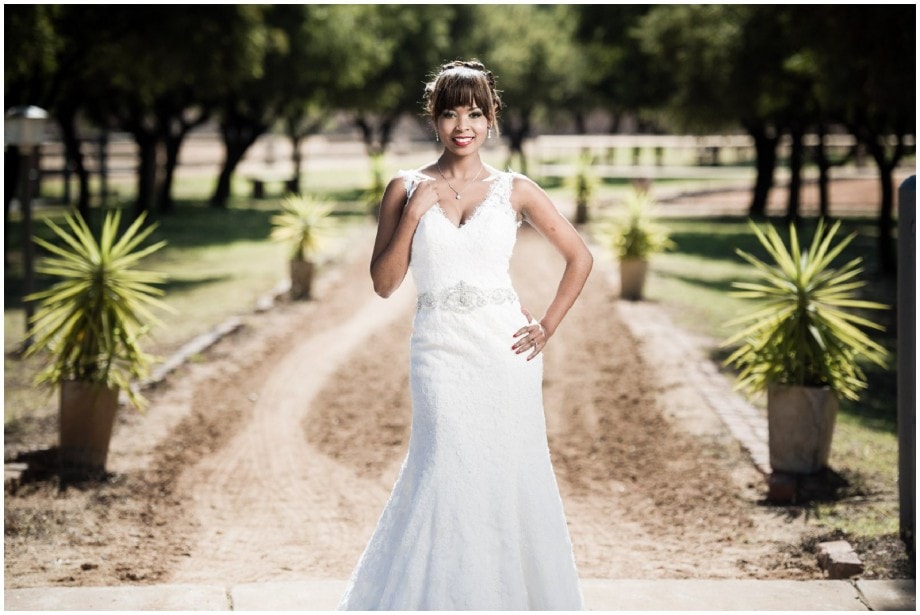
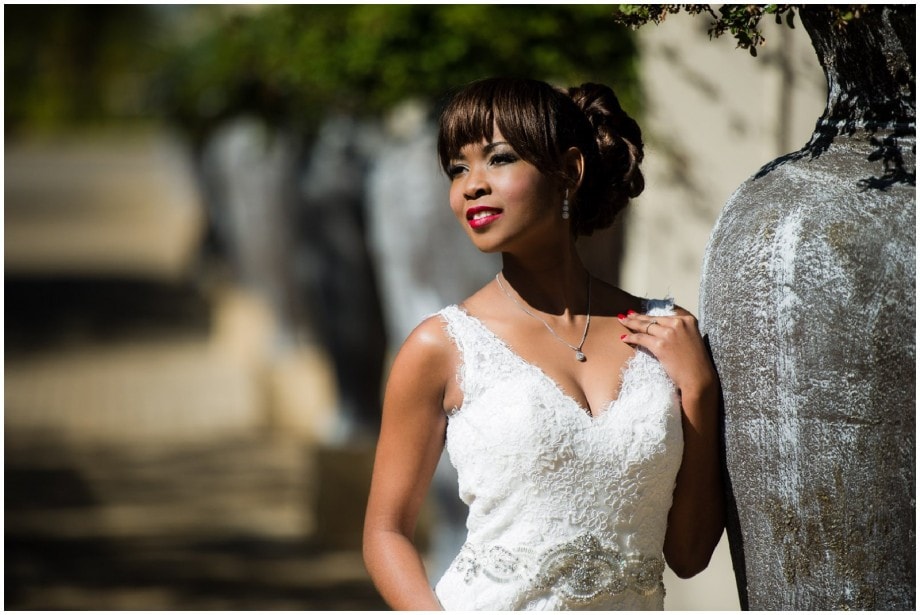
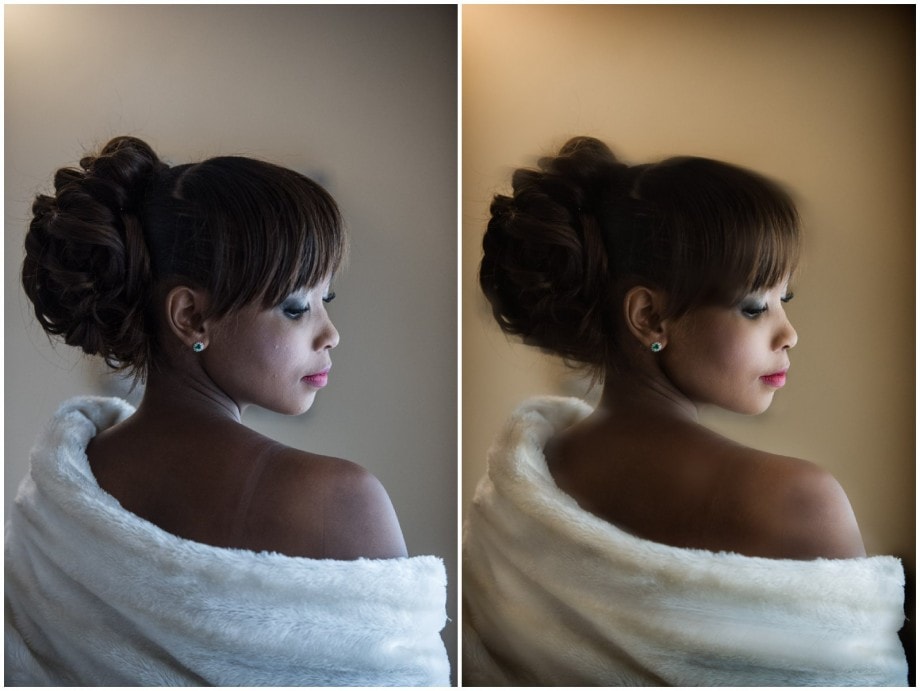
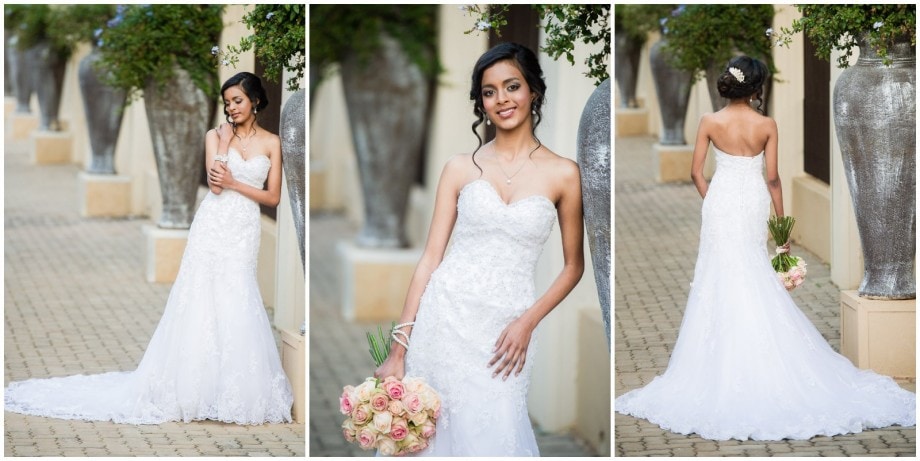
Natural Light Portraits
I demonstrated to the class how you don’t always need an elaborate lighting setup for elegant portraits. We shot a few three-quarter portraits of our model against a vanishing point, using natural light only. Shooting into the sun is one of the key lighting techniques used by wedding photographers to create dreamlike portraits; the perfect lighting setup for romantic shots! Shooting in RAW allows you to overexpose the scene in order to prevent your model turning into a silhouette, while still being able to pull some of the dress details back in post. Afterwards, in Lightroom, we’ve added some dynamic lighting to the bride’s face and opened the shadows a little to emphasise her gorgeous eyes.

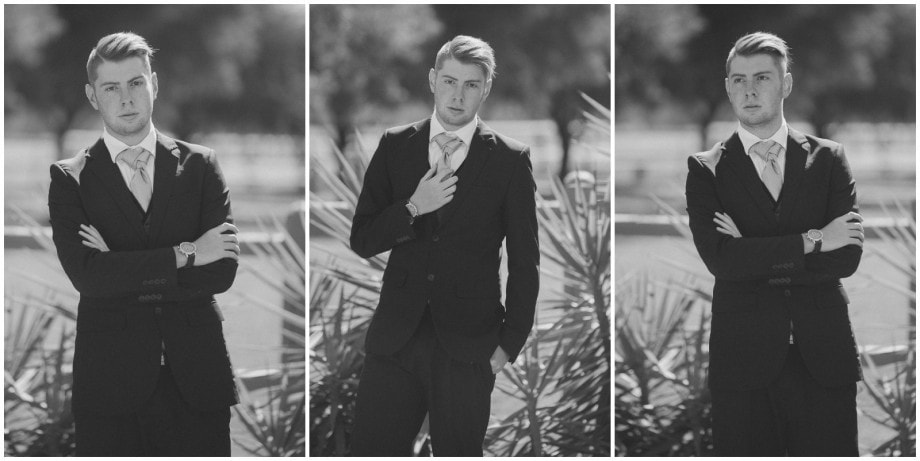
Using Reflectors
We showed the class how easy it is to use the scrim of a reflector to hide any light spots that might otherwise ruin a portrait. Shooting into a vanishing point creates a clean and elegant shot of our groom.
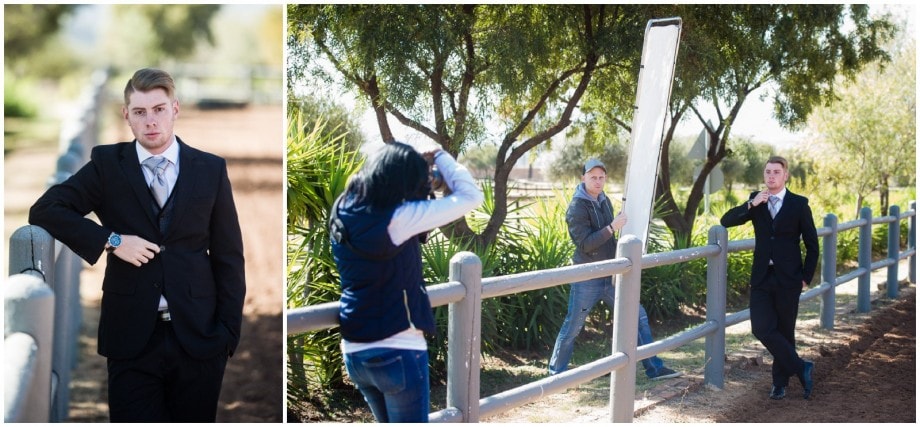
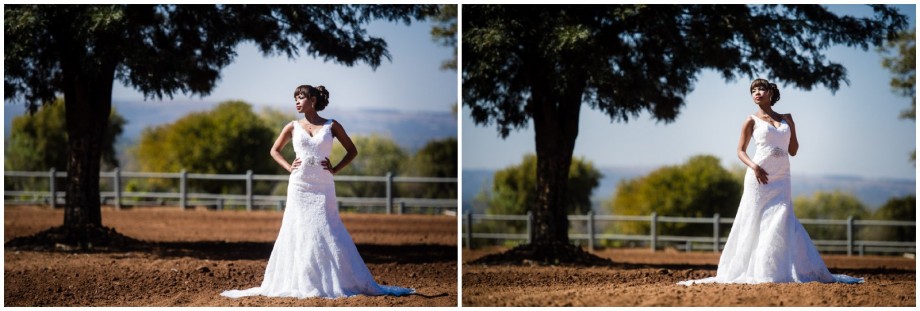
Using the silver and gold zebra stripes of a large 1.8m Sunbounce reflector we showed the class, how they can shoot in harsh lighting conditions, by simply adding an additional reflector The zebra stripes from this particular reflector add some warmth into the image and worked wonderfully with our models’ skin tones. The warmth, coming from the Sunbounce, also adds a comfortable glow to our model’s gorgeous dress, pushing out the blue shadows that you might otherwise get in shots like these.
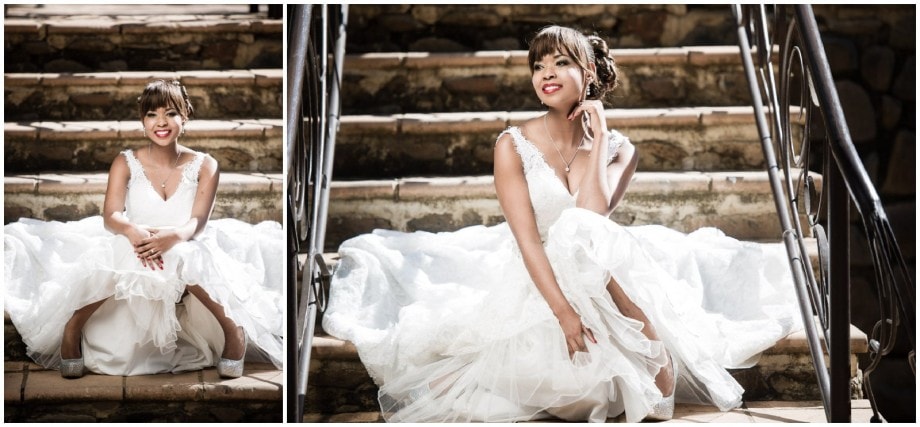
Making harsh light work for you
Here we demonstrated how to use posing in order to make harsh lighting conditions work for us. Wedding photographers are often forced to take images in difficult lighting conditions. It is not always possible, or practical, to have an array of powerful lights and modifiers available throughout every portrait session (like when your assistant has to go photograph the reception hall or fetch something from the car!). In these situations, knowing how to work in harsh light can be a game changer.
Edit for Excellence
Even though this was not an editing workshop, we did share a few important techniques that provide professional results. We gave our students some of our favourite import and development presets, which we use on a daily basis. Additionally, I also showed off some helpful Photoshop techniques that I use in my own wedding photography.
Shoot for the album
Being able to plan your album design during your shoot is very important if you want to be able to tell a story through your images in the final album. During our shoot, we were sure to keep our students focused on the post-processing processes. This includes knowing how to keep your subject framed correctly to ensure a consistent full page album spread as well as knowing which details to include, in a series of images.
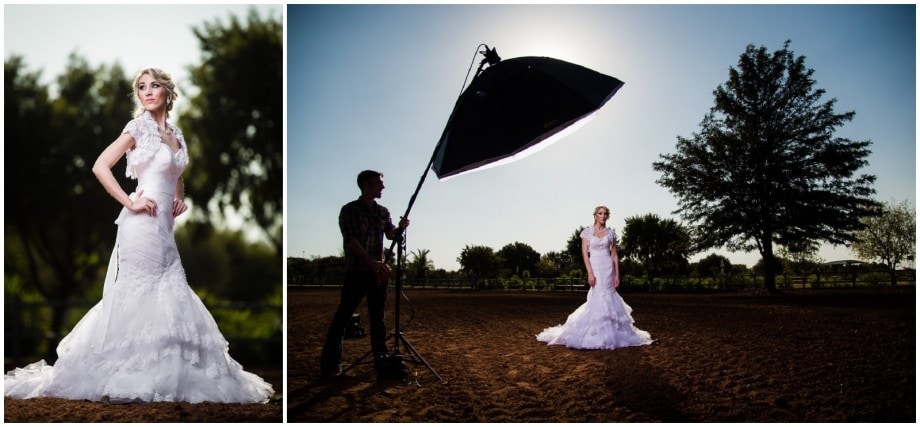
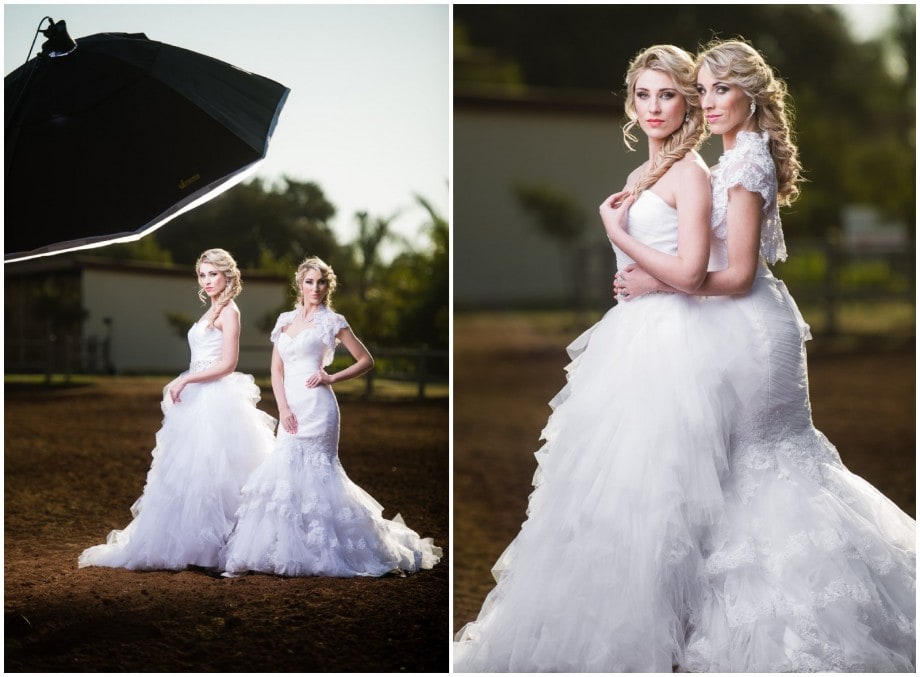
Demonstrating the power of flash photography
Flash photography can bring a lot of diversity and creativity to your wedding shoots and we did a demo on how to use flash to create over-the-top portraits. For our demo shot, we used battery-powered flash units through a 2.1m parabolic brollie. Thanks to my powerful Photon lighting gear we were able to effectively overpower the sun, even though we were shooting through such a big light modifier. You can read more about my Photon equipment in this article: Photon Lighting
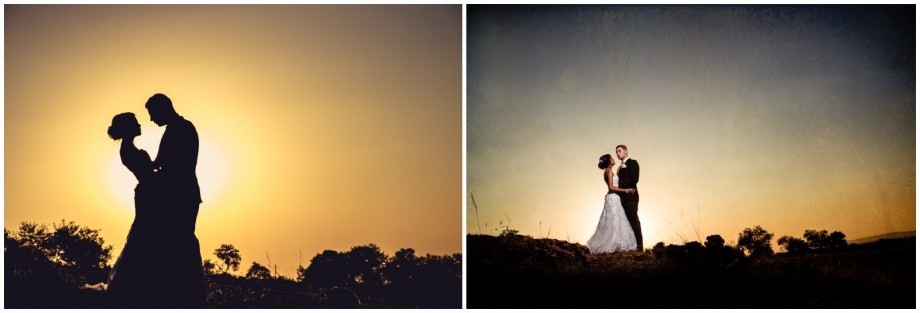
Sunset Shots
Sunset shots are a big hit with wedding clients. We showed our students how to scout for a good sunset location even though you might be at a difficult venue. We also shared how to shoot effective silhouette images as well as techniques of shooting images to easily edit out your lighting assistant without long tedious Photoshop cloning the next day.
Leave A Comment