

~ Updated: 2023-03-02
We take a quick look at performance increases and offer tips on getting more speed in Lightroom Classic (LrC).

Is Lightroom Classic faster?
From my initial tests, Lightroom Classic is indeed faster than its predecessors. This has been confirmed by various other websites, including extensive benchmarks by Puget Systems.
Obviously, Lightroom’s performance will be determined by your computer’s speed. From my own casual benchmarks, Lightroom Classic utilises more system resources, especially RAM (which is a good thing) than the older version. If you are in the process of buying a computer for editing or considering upgrading your current PC, we highly recommend you also read our article on “The Best Computer for Photo Editing”.
Performance increases in Lightroom Classic
Update 2023-03-02: Since we first wrote this article, Lightroom Classic (LrC) has undergone significant changes both to its performance and features. It is incredibly important to ensure your graphical drivers are up to date, as the masking features make use of AI technologies that heavily depend on your graphics card. Laptops with out-of-date graphical drivers may run into difficulties when making use of the “Detect Sky/Object” AI features.
In this next section, we will be looking at what Adobe changed regarding performance in the new Lightroom Classic and how it compares to previous versions of Lightroom:
1. Previews
Since Lightroom version 1, Previews have been a very important part of how Lightroom Classic works. Unfortunately, the way Lightroom used previews became bloated and restricted performance. With Lightroom Classic, Adobe has put a lot of work into speeding up every aspect of preview rendering. Let’s break it down and see what’s different:
1. 1 Parallel Preview Generation
As of Version 7, a setting was added under the performance tab of “Preferences” that allows you to generate previews concurrently to other tasks. If you have a high-end CPU, this may speed up your workflow by completing tasks faster. However, running so many tasks at once may drag down lower-end computers, so we suggest you only enable this feature if you have a powerful computer.
1.2 Embedded Previews
Adobe has the ability to create only the “Embedded & Sidecar” previews when importing photos. An embedded preview is the image you see on your camera after taking a photo. If you find your computer takes too long to create previews upon importing, you can now opt to have Lightroom use the embedded previews, instead of waiting for previews to be built. This is handy if you have a slightly slower machine, or struggle with disk space. You can always generate full-sized 1-1 previews for your photos at any time.
Using embedded previews has a lot of advantages:
- Lightroom prioritises folders you are actively viewing, giving those you are working on a higher priority. This speeds up the selection and culling process.
- Although they are of a much lower quality than standard previews, they will appear in the filmstrip faster, since Lightroom doesn’t have to create a preview from scratch. This allows you to start culling and sorting as soon as you see your photos appearing on the film strip after you hit “Import”.
- Faster zooming into photos.
Lastly, there’s a new checkbox under the General tab of Preferences. When selected, this tells Lightroom to replace the Embedded previews with Standard previews whenever Lightroom is idle and you are not using your computer. It is unticked by default (as it slows Lightroom’s processing speed) but you may want to enable it whenever you are not using your computer.
1.3 Smart Previews
Since Lightroom CC 2015 (Version 6), Adobe added the functionality of using smart previews for editing, instead of full-size previews. To enable this feature, click on “Use Smart Previews instead of Originals for image editing” under the Performance tab in Preferences. According to Adobe, this will allow for increased performance since you are working with a smaller file size, which also means it will look slightly worse while you are editing it. However, when exporting the image, it will be in full quality.
2. Lightroom interface speed improvements
- For Windows, Adobe has made some speed improvements to Lightroom Classic’s backend graphics library. This results in faster image rendering in Grid, Loupe and Filmstrip Views.
- Switching between Library and Develop modules has been optimised and should now be a lot faster.
- Whilst in the Develop module, Lightroom will read the histogram data ahead of time. The result is faster responses when switching between multiple photos.
- Lightroom Camera RAW cache improvement allows for faster rendering of high-resolution photos. This change is the most obvious when working with large images.
3. Catalog Improvements
Whenever there is a new major version of Lightroom Classic, you will be prompted to upgrade your catalog. Adobe has made some improvements to the loading times of catalogs by compressing the develop history and metadata values. Take note that larger catalogs will take longer to upgrade, so make sure you upgrade whenever you’re not going to need your PC (it shouldn’t take hours though!)
4. Performance when creating HDRs and Panoramas
As of Version 7 of Lightroom Classic, computers with more than 12GB RAM will take advantage of CPU and memory optimizations which visibly increase HDR and panorama rendering.
Lightroom Classic is faster than the previous versions in almost every aspect. Unfortunately, while rendering HDRs and Panoramas, we noted a significant performance drop in According to Puget Systems; HDR rendering is 15 – 25 % slower, while Pano rendering is up to 20% slower in Classic. However, what you lose on the swings you gain on the roundabouts. With the performance increases you get in all other areas, slower HDR and Panorama rendering is a rather small price to pay!
Tips on getting more speed in Lightroom Classic
We offer a host of tips on getting more speed in Lightroom Classic CC; from hardware tips to Lightroom settings:
1. Get a CPU with faster clock speeds over many cores
From my own tests, and from benchmarks available on the net, it is clear that both Lightroom and Photoshop prefer CPUs with faster internal clock speeds over slower, multi-core CPUs. You will get better performance from an affordable Core i5 running at 3.8GHz, or a Core i7 running at 4.2GHz than the ridiculously expensive Core i9 with 18 cores running at 3.2GHz.
If you are using Photoshop and Lightroom for your editing, and not using other high-end applications that require many cores, you can stick to the more affordable i5 or i7 CPUs. Saving money has never been a bad thing!
2. Graphic Acceleration: Enable or disable?
With advances in AI technologies, Lightroom Classic now makes use of your graphics card more than ever. Ensure that your graphical drivers are up to date to avoid running into any issues while using Lightroom Classic.
The GPU is not used for any regular tasks. It is only used when editing photos in the develop module. Unfortunately, it is very difficult to benchmark, as you will rather get a “feel” for how responsive the filters and brushes are when editing.
My initial tests show that both radial and linear filters, as well as the brushes, seem a lot smoother if you enable graphics acceleration on a capable graphics card. However, my tests revealed that other tools, like the healing brush, are excruciatingly slow with hardware acceleration turned on. Obviously, your experience and needs might be different than mine. I, therefore, strongly recommend that you run your own tests: edit a few images using brushes, filters, and the spot removal tool with graphics acceleration enabled. Then test the same edits, with graphics acceleration disabled.
In a nutshell, GPU acceleration is entirely dependent on your graphics card, CPU and the resolution of your screen. I.e.
- If you are using a Full-HD screen and mid-range or integrated graphics card with an average CPU, you are better off disabling graphics acceleration. Turning it on will most likely make your Lightroom slower.
- If you are using a Retina, QHD or 4K screen, with a powerful high-end graphics card, you will want to turn graphics acceleration on in order to see any major difference in performance.
Note that Lightroom detects what type of graphics card you have and may disable graphics acceleration by default on lower-end computers. In this case, it’s best to just leave it disabled.
3. Get more RAM
The easiest and most efficient way to speed up your Lightroom is to simply upgrade your RAM. We recommend getting at least 16GB of RAM. While Lightroom is running, it can use up to 8 GB RAM consistently and can reach up to 16GB RAM when performing strenuous tasks like creating an HDR, Panorama or Exporting photos. Based on this, you can never have too much RAM. The more you have, the better!
Check your laptop manufacturer’s website to see if your laptop is capable of having its RAM upgraded or send us a message on Whatsapp with your Laptop make and model so we can check for you!
4. Run your Lightroom Catalog and Preview folders on a fast SSD
Since SSD drives have no moving parts, Lightroom can access the catalogue and previews immensely faster than the conventional hard disk drive.
When you aren’t using full-sized previews, Lightroom needs the original photos for processing. When using full previews, you won’t see much of a difference. Considering this, you should have both your catalogue and your previews on your SSD, as Lightroom is constantly accessing them.
The ideal setup would be to have everything on an SSD – your catalog, previews and your original photos. This will result in the most significant improvement. Sadly, SSDs with capacities larger than 1 TB are expensive, which makes keeping your photos on them rather impractical.
5. Optimise your Catalog frequently
The catalogue is a database which consists of several tables of recorded data. By simply going about your normal daily tasks, these records are constantly being changed or deleted. Think of it as emptying the recycle bin. When you optimise your catalogue you permanently delete all those deleted records that just take up unnecessary space. This makes your catalogue size smaller, which in turn makes the system run faster.
6. Keep your Catalog and Preview Folder in the same folder
When installing Lightroom, it puts the catalog and preview cache together by default. However, it is common to move your cache to a dedicated cache drive. This is counterproductive as Lightroom regenerates the previews every time if they are not located in the same folder.
7. Increase Lightroom’s Cache size
Whenever Lightroom generates previews, it places them in the Camera RAW cache. By default, the cache size is 5GB and as soon as the limit is reached, the oldest data gets replaced by the newer data. As 5GB can be used up rather quickly, it seems rather pointless and you won’t see a difference in performance. By increasing the cache to around 25GB, you increase the amount of data that is accessed regularly, which dramatically improves your performance.
For laptop users that may struggle with limited space, we recommend leaving the cache between 5 and 10GB.
8. Purge your RAW Cache
The reason why Previews might cause Lightroom to slow down could be for several reasons:
- The cache file becomes bloated with old previews you are no longer using.
- Your cache becomes corrupted.
- Lightroom tells you it is unable to read the cache.
Frequently purging Lightroom’s RAW Cache, will recover disk space while speeding up your workflow. This is particularly relevant if you’re no longer working with photos currently sitting in your RAW Cache. Obviously, clearing the cache, while still working on those files, will have an adverse effect on Lightroom’s performance. You can purge your cache under the “Camera Raw Cache Settings” of the “File Handling” tab in “Preferences”.
9. Automatically Discard 1:1 Previews
1:1 Previews take up extra disk space and might slow down your Lightroom experience unnecessarily if you’re not working on those files. If you are disciplined and typically finish working on photos within a specific period, you can tell Lightroom to automatically discard 1:1 previews after 1 Day, One Week, or, 30 Days. You can set the 1:1 Preview Cache by going to the “File Handling” tab under “Catalog Settings” and clicking on the drop-down list “Automatically Discard 1:1 Previews:”.
10. Manually delete the Previews.lrdata file (Extreme cases)
In extreme situations, i.e. where disk space becomes a serious issue, or if you get error messages during operations that generate previews, you might need to manually delete the Previews.lrdata file, which is typically stored in a file next to your catalog. Be sure that you do NOT delete the Catalog File! By deleting the previews cache manually, Lightroom will regenerate new previews only for the files you are working on, which will increase performance.
11. Power Management (Windows)
By default, your laptop tries to balance power usage and performance. This doesn’t allow your hardware to run at its full potential and could cause your laptop to slow down tremendously. To ensure your laptop is always running at peak performance, always have it plugged into a power outlet whenever possible. You can also enable “High Performance” mode in the Power Options from the Control Panel in Windows:
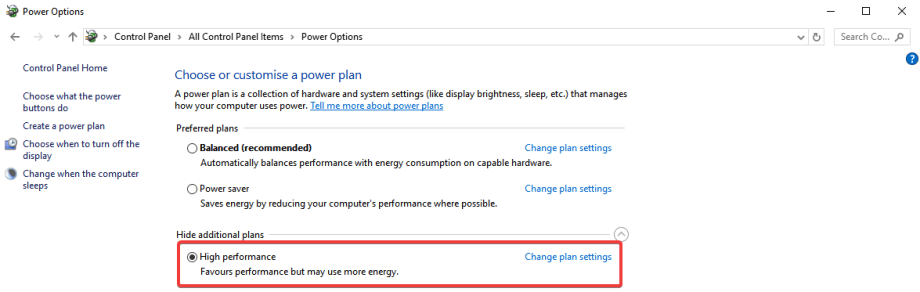
Getting more speed in Lightroom Classic CC | Set your Windows Power Plan to “High Performance”
12. Reduce the number of Develop Presets you have
The navigator in the Develop module generates thumbnails for every preset, which can reduce performance. This is most evident when you have more than 2000 presets. You can avoid this type of performance issue by reducing the number of Develop Presets you have, or by simply limiting it to those you use the most often.
While we are on the topic of presets, it would be very helpful if Adobe could implement some form of folder structure for develop presets. Currently, they are simply sorted into a single hierarchy. Creating a parent–subfolder system would most certainly speed up the time it takes to browse through all your presets.
13. Restart Lightroom periodically after using it for some time
It is essential to restart Lightroom regularly. After working for a few hours in Lightroom, especially if you’re working with high-resolution files, HDRs, or Panoramas, you will notice it starts to slow down to a crawl. If you pick up any lag, simply restart Lightroom, and it will be back up to speed again.
14. Delete your Lightroom Preferences (Extreme cases)
Sometimes, after following all the advice above, Lightroom simply needs a fresh start. Before launching Lightroom, press and hold Shift + Alt (Shift + Option + Delete for Mac users) and launch Lightroom. A dialogue window should appear prompting you to reset Lightroom’s Preferences.
Take note that all preferences will be reset to Adobe’s default values after you upgraded, so make sure that you go through each of the following settings and restore them to how you had them set up:
- General
- Presets
- External Editing
- File Handling
- Performance
- Catalogue Settings
Tip: To make your life easier, take screenshots of all your preference settings before resetting them.
15. Delete Creative Cloud Temporary files (Windows)
Lightroom should by default clean up temporary files by itself. However, if your Lightroom crashes while performing tasks like creating HDRs or Panoramas, some temporary files may remain behind. You can check whether it is taking up unnecessary space by pressing the windows button and typing %localappdata% and hitting enter. This will open your Local AppData folder. Then open the “Temp” folder and scroll down to “CreativeCloud” and check the size of the folder. The normal size should be around 44MB.
16. Disable Facial Recognition
Having facial recognition enabled can slow down Lightroom, as it is constantly searching for faces while moving through the film strip. Disabling it goes a long way to getting more speed in Lightroom.
In closing…
We are delighted to see that Adobe has improved the overall performance in Lightroom Classic dramatically, compared to previous versions. Implementing the above tips will assist you in optimising your Lightroom workflow and speed. You should also check out the articles linked below for more information related to Lightroom performance:
Learn Lightroom Classic
Learning Lightroom: If you’re new to Lightroom, or would like to use Lightroom more effectively; check out our 2-Day Lightroom Workshop.
Thank you for these tips! LR It’s awfully slow, I’m really considering ditching it and trying something else!
I posted this comment on a couple of websites. Please excuse me if this was one of them! I have not kept track of where I did the posting. I realize thiat the original post is rather old, but the test I describe below is quite relevant to speeding up LR classic, so perhaps the moderator of this site could put in on a more current thread. By the way I do have the Graphics accelerator box checked as well as cache size box up at 72.
I did a quantitative test. Such a test seems to be lacking on discussion pages re LR memory needs and performance. My computer: iMac retina 5K, 27 inch, 2019, Mohave 10.14.6. LR is most up to date version of Lightroom Classic 8.3.1, Radeon Pro 580X 8Gb memory on the board. I’ll get into computer memory in a moment. Working with RAW files from Nikon Z7 with typical size of 60 Mb.
1. iMac arrived with 8 Gb memory installed. Did and HDR merge in LR with three images Took about a minute. Way too long for simple operation so I did not do subsequent tests with this amount of memory.
2. Put in2 x 16 GB OWC memory chips via Amazon. Did a test require HDR AND Pano merge – 18 images total (about 60-65-Mb each) with 3 images HDR set at each of 6 positions for the Pano. Took 1m 38s for LR to create the Pano in preview mode. Took an addition 1m 44s to creat the final image – a Pano with each segment an HDR image for total of 3m 22s. Clearly much better than simple 8 Gb.
3. so I upped the ante going to 4 x 16 chips for total of 64GB. Repeated same test as in example 2. This time it took 1m 10s to generate preview in Pano mood. A modes improvement of almost 30s. But then I let it go ahead to create final image. This took an addition 36s for a total of 1 46s ABOUT TWICE AS FAST AS WITH 32Mb. Amazing.
Thank you.You have just saved me £1500.00. Lightroom was really playing me up after the last update but after reading this article I change a setting on my computer & it is now working beautifully. So thank you very much.
Thanks for the feedback Derik. The rumour is that the next Lightroom Classic CC update will perform even better and I might update this article. But let’s wait for the jury to come out first. I will keep you posted!
Excellent article … well worth keeping handy !